When I first opened Notion, ang daming buttons, blocks, and templates na halos gusto ko na lang isara ulit. 🙃 If you’ve ever felt na “Grabe, parang coding ito” – don’t worry, I was right there with you.
I’m not a productivity guru, not a Notion coach. I’m just a sabog VA trying to get my freelance life together.
And the good news? You don’t need to know everything in Notion. In fact, I learned you only need three basics to get started. Today, I’ll walk you through them – kasi sabay tayo matututo.
Contents
Basic 1: Blocks (Your Building Bricks)
Confession time: the first time I opened Notion, wala akong idea saan ako magsisimula.
So here’s what I actually did:
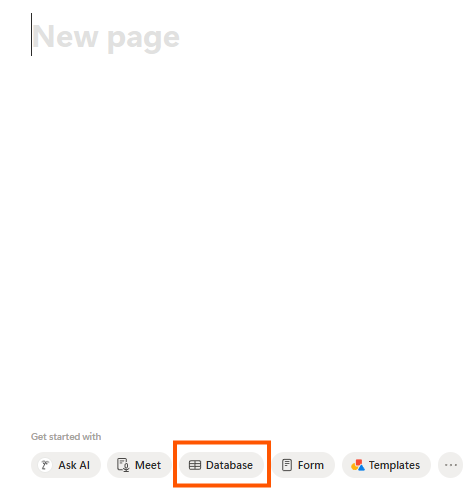
1. Create a new page by clicking this icon 👇🏻

2. Dun ko lang na-realize na inside a page, every single thing you add is a block.
Text? Block.
To-do list? Block.
Image, table, toggle? All blocks.
It’s basically like LEGO – drag, drop, and arrange them however you want.
👉 How I tried it:
- I created a page and labeled it To-do List then hit Enter
- I typed “/” and suddenly may menu ng options (to-do list, headings, divider, toggle list).
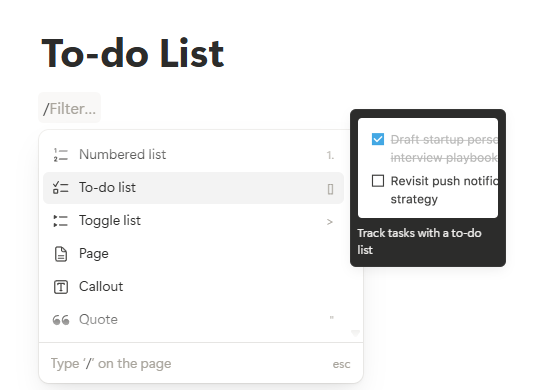
I made a simple checklist:
- Write blog draft
- Send invoice
- Walk outside (self-care counts 🫰🏻)
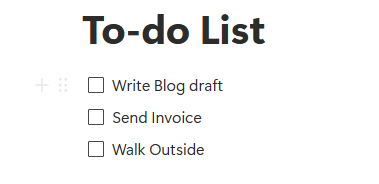
And just like that, I ticked my first Notion block. Ang sarap pala sa feeling! LOL
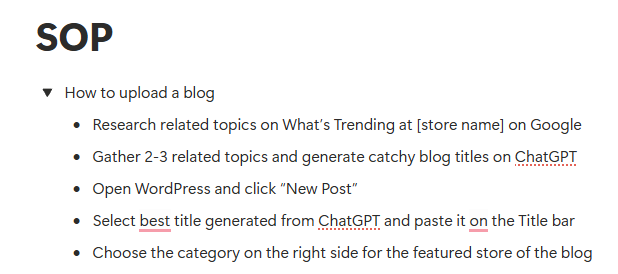
💡 Pro-tip I just learned: Use toggle blocks for SOPs. Example, I wrote:
“How to upload a blog” → inside the toggle, I listed the steps.
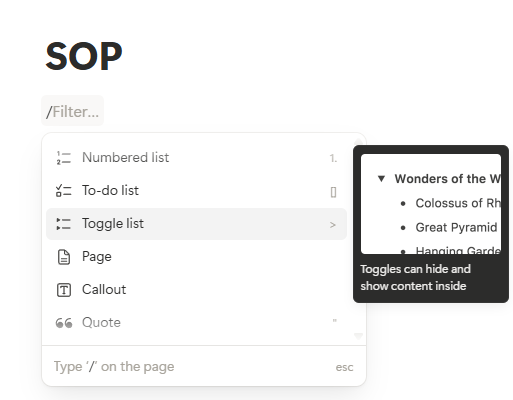
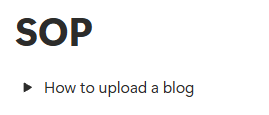
Now I don’t have to scroll through a super long doc – I can expand lang when I need it.
Basic 2: Databases (Your Command Centers)
Next, I played with databases. Honestly, nakakatakot at first kasi parang technical word. But in reality, a database in Notion is just a table that can transform.
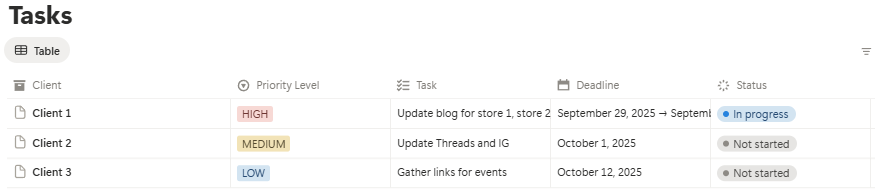
I started with a table called “Tasks.” Columns I added:
- Client
- Task
- Deadline
- Status

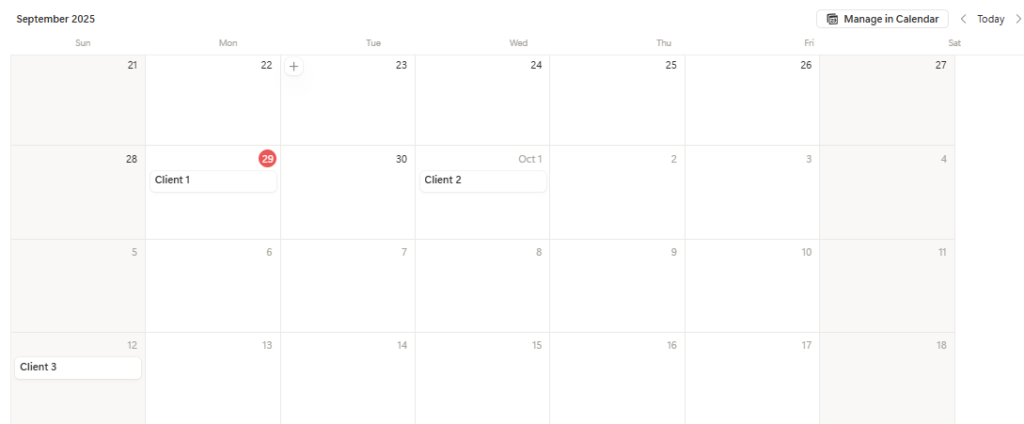
👉 Here’s the magic: I can turn that same table into:
- Calendar view → to see deadlines by date.
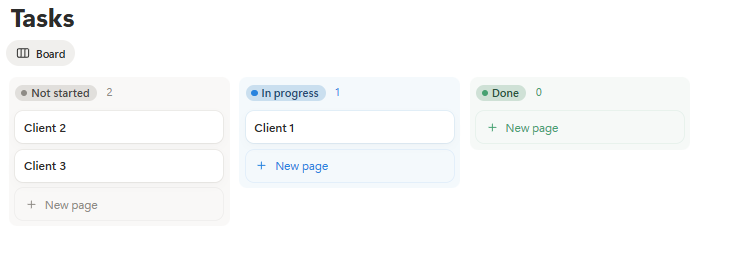
- Board view (like Trello) → drag tasks from “To Do” → “Doing” → “Done.”
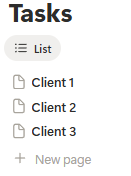
- List view → for a simple checklist vibe.
So imagine: one set of info, pero you can see it in different ways. Unlike Sheets kung saan kailangan mong gumawa ng bagong tab for every view.
💡 Pro-tip I just learned: Add a “Priority” column (High, Medium, Low). Then filter your database so only High priority tasks show up. Suddenly, my day looks clearer.
Basic 3: Views & Filters (The Overwhelm Killers)
This one sold me on Notion. Kasi let’s be real, overwhelm is my middle name lately.
Views and filters let you choose exactly what you want to see.
👉 How I tried it:
- I filtered my task table to show only this week’s deadlines.

- I made a view per client (Client 1 view, Client B view). Now hindi halo-halo lahat sa mata ko.
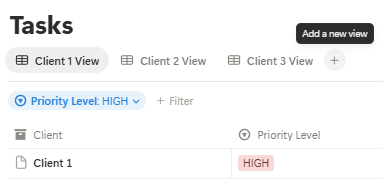
- I created a “Today” view – so every morning, I click it and see exactly what needs to be done today.
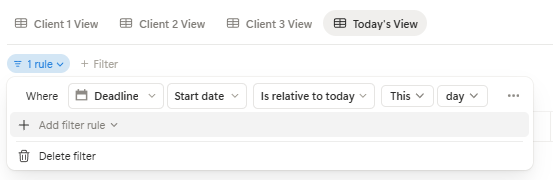
Ang saya! Haha! Hindi ko na kailangang mag-scroll through 20 tasks just to find what’s urgent.
💡 Pro-tip I just learned: Save each view! Para next time, one click lang.
✨ My Takeaway So Far
Honestly, I thought Notion would be too complicated. But starting with just Blocks, Databases, and Views/Filters made it less scary.
Now, instead of feeling like Notion is a spaceship I don’t know how to drive, it feels like a desk where I can arrange my own things. And that’s all I need right now.
Kung kaya ko—na literal na blangko utak pag nakaharap sa tracker—kaya mo rin. Promise.
📅 Coming Next
Next week, I’ll share how I built my first Task Manager in Notion – step by step, so you can copy it in under 30 minutes.
Think of it like building your very first client-ready system, but for yourself.
📦 About the Series
This post is part of The Frugal VA’s Notion Series — a step-by-step guide for beginner freelancers and VAs who want to build simple systems, organize client tasks, and finally say goodbye to the sabog life. Catch new posts every Monday!
Disclaimer: Please note that some of the links on this blog may be affiliate links, meaning I may earn a small commission if you make a purchase or take an action through those links. This comes at no extra cost to you. I only recommend products or services that I personally trust and believe will add value to my readers. Thank you for supporting my blog!
No Responses