When I built my first task manager in Notion, I wasn’t trying to make it pretty.
I just wanted to stop staring at my client’s tracker and freezing. 😅
I already knew the basics—blocks, databases, and filters—pero applying them sa totoong freelance setup? That’s another story.
So this week, I finally tried to make it work for my actual workload.
Contents
The Problem: The Tracker That Tracks Nothing
Our client uses Google Sheets to assign topics and deadlines.
It’s simple – tabs for stores, topics, links – but when I open it, my brain goes blank.
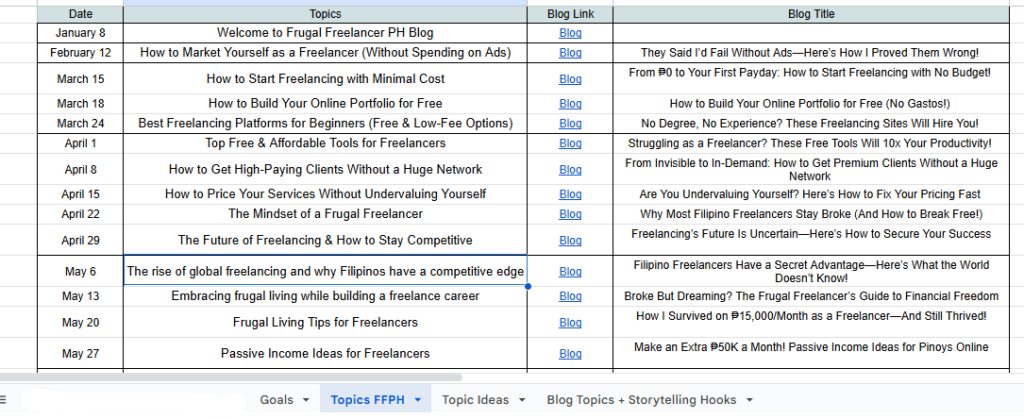
Hindi ko alam kung alin ang uunahin.
Hindi ko alam kung alin ang due.
At tuwing susubukan kong mag-update, nauubos lang oras ko kakahanap ng tab.
So I decided to build my own system – one that actually fits how I think and work.
The Setup: Turning Theory Into Something Real
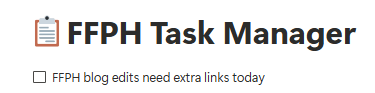
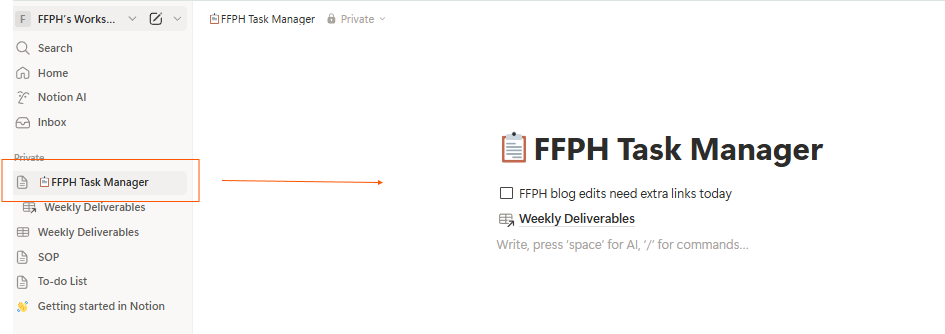
I opened Notion and pressed Ctrl + N or click the create new page icon to make a new page.

Title? “FFPH Task Manager”
From there, I applied what I learned in the first two parts:
- Blocks for quick notes or reminders
- “FFPH blog edits need extra links today.”
- Database Table for weekly deliverables
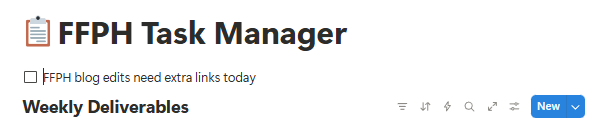
- Columns: Task | Client | Deadline | Status | Priority

- Views & Filters para di ako malunod sa dami ng info
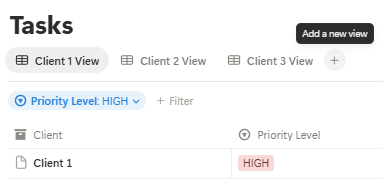
- Filter: Status ≠ Done and Deadline is this week

I realized, it’s not about mastering a tool – it’s about making work feel less heavy.
The Real Application: Making It Mine
After setting up the basics, nilagay ko na agad yung mga actual client tasks ko.
Every time I finish a blog, I change the Status from “Doing” to “Done.”
When new tasks arrive, I just add them straight into the table – wala nang scattered sticky notes or mental lists.
Then I created two new views:
Calendar View → to see which days are loaded

Today View → filtered to show only what’s due today

I pinned “Today View” on my sidebar, and now every morning, isang click lang – and I know exactly what to do. This is how I did it:
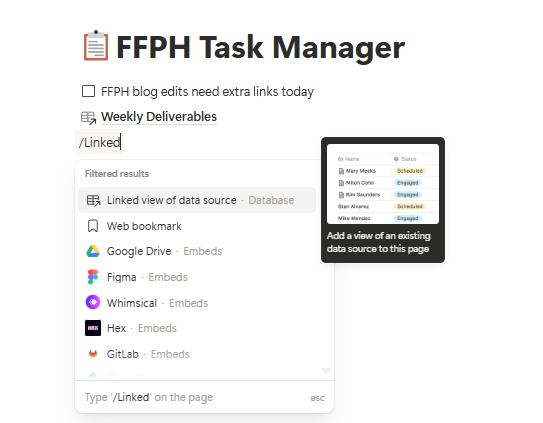
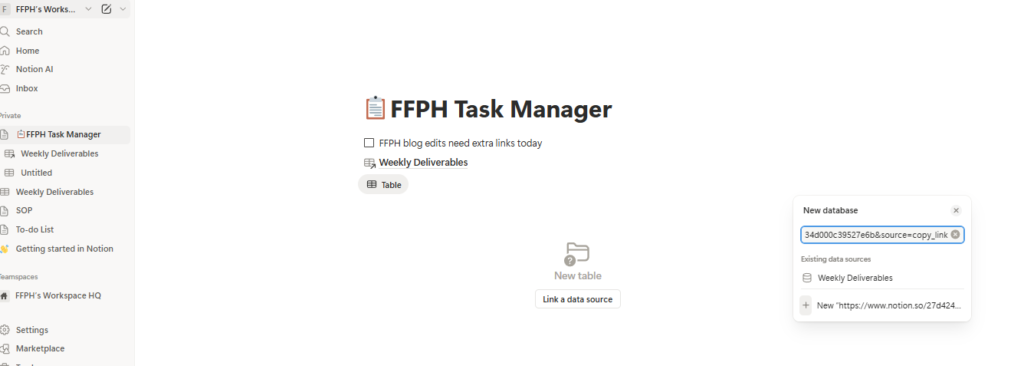
- I opened my Main Dashboard which is “📋FFPH Task Manager”
2. Then I’ll add”+ /linked view of data source
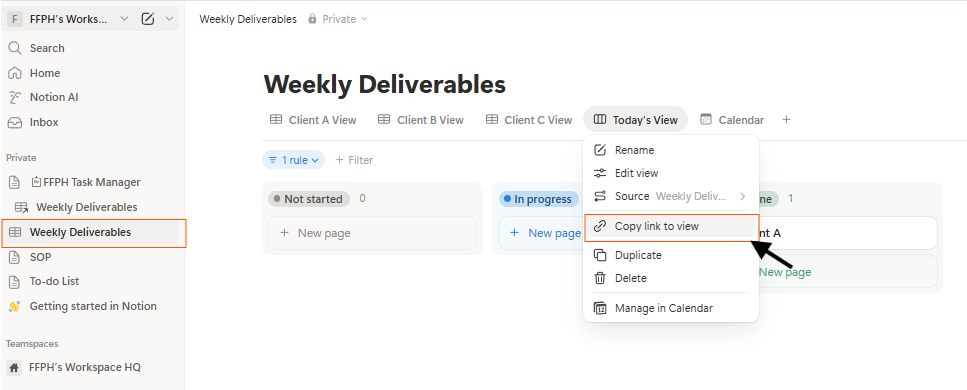
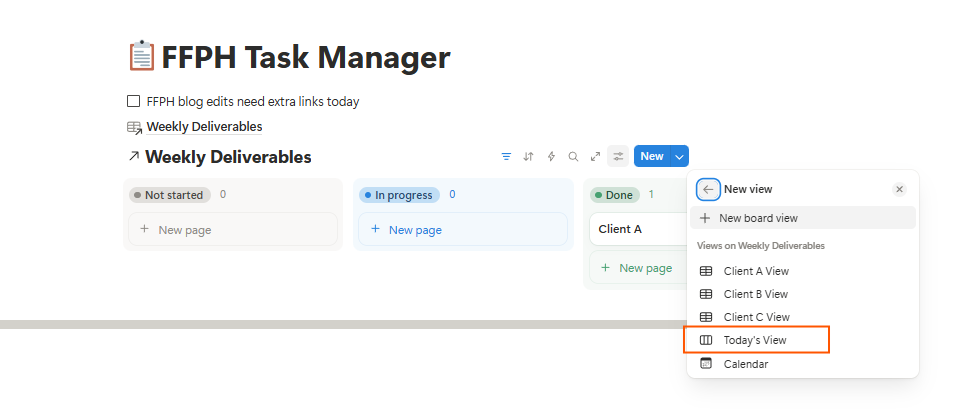
3. Go back to your Weekly Deliverables and copy the link of “Today’s View” like this:
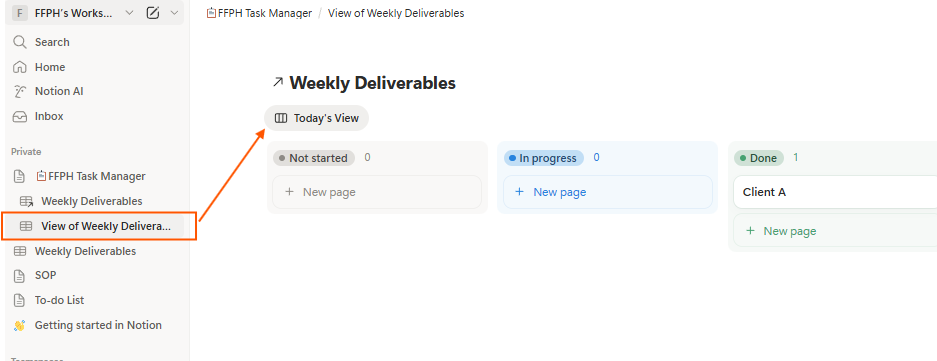
4. Then go back to your Main Dashboard and paste the link of “Today’s View”
5. All of your Views will appear just like below then select “Today’s View” to pin it on your dashboard
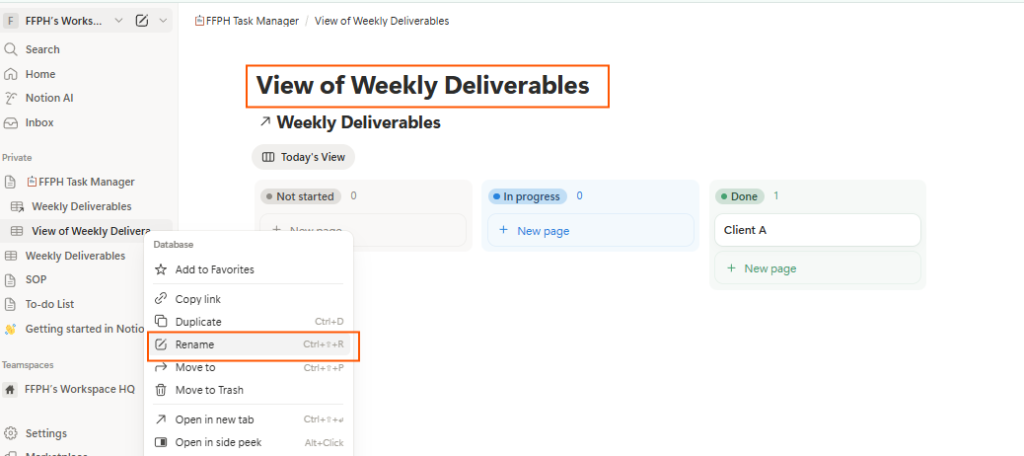
6. Today’s View will appear on the left side of your browser, you can rename it to “Today’s View” as preferred by clicking the three dots (…) sa tabi nung gusto mong i-rename na view.
No panic. No guesswork. Just clarity.
✨ Try It Yourself
You can actually duplicate my Task Manager and make it your own!
I made a clean, public version using my Frugal Freelancer workflow (no client data, promise).
👉 Duplicate it here: Duplicate my Notion Task Manager
Once you duplicate it, you can edit the columns, rename sections, or change “Clients” to whatever projects you handle.
💡 Pro-tip: Rename your views like “Today,” “This Week,” or “Done” para madaling i-filter.
💡Why I’m Sharing This
Because sometimes, you don’t need to buy a full course to start organizing your freelance life.
You just need something small that actually works.
That’s why my upcoming Notion Starter Kit will include this template plus a guided setup – for freelancers who want to level up from “basic task manager” to “real workflow system.”
📅 Coming Next Monday…
Now that I finally have a working system, it’s time to expand it.
Next week:
Part 4: Creating a Client Dashboard That Makes Sense
One view for all your clients, deliverables, and deadlines — no more jumping through tabs or losing updates in Slack.
We’re slowly turning chaos into calm — one Notion block at a time. 💻✨
📦 About the Series
This post is part of The Frugal VA’s Notion Series — a step-by-step guide for beginner freelancers and VAs who want to build simple systems, organize client tasks, and finally say goodbye to the sabog life. Catch new posts every Monday!
Disclaimer: Please note that some of the links on this blog may be affiliate links, meaning I may earn a small commission if you make a purchase or take an action through those links. This comes at no extra cost to you. I only recommend products or services that I personally trust and believe will add value to my readers. Thank you for supporting my blog!
No Responses